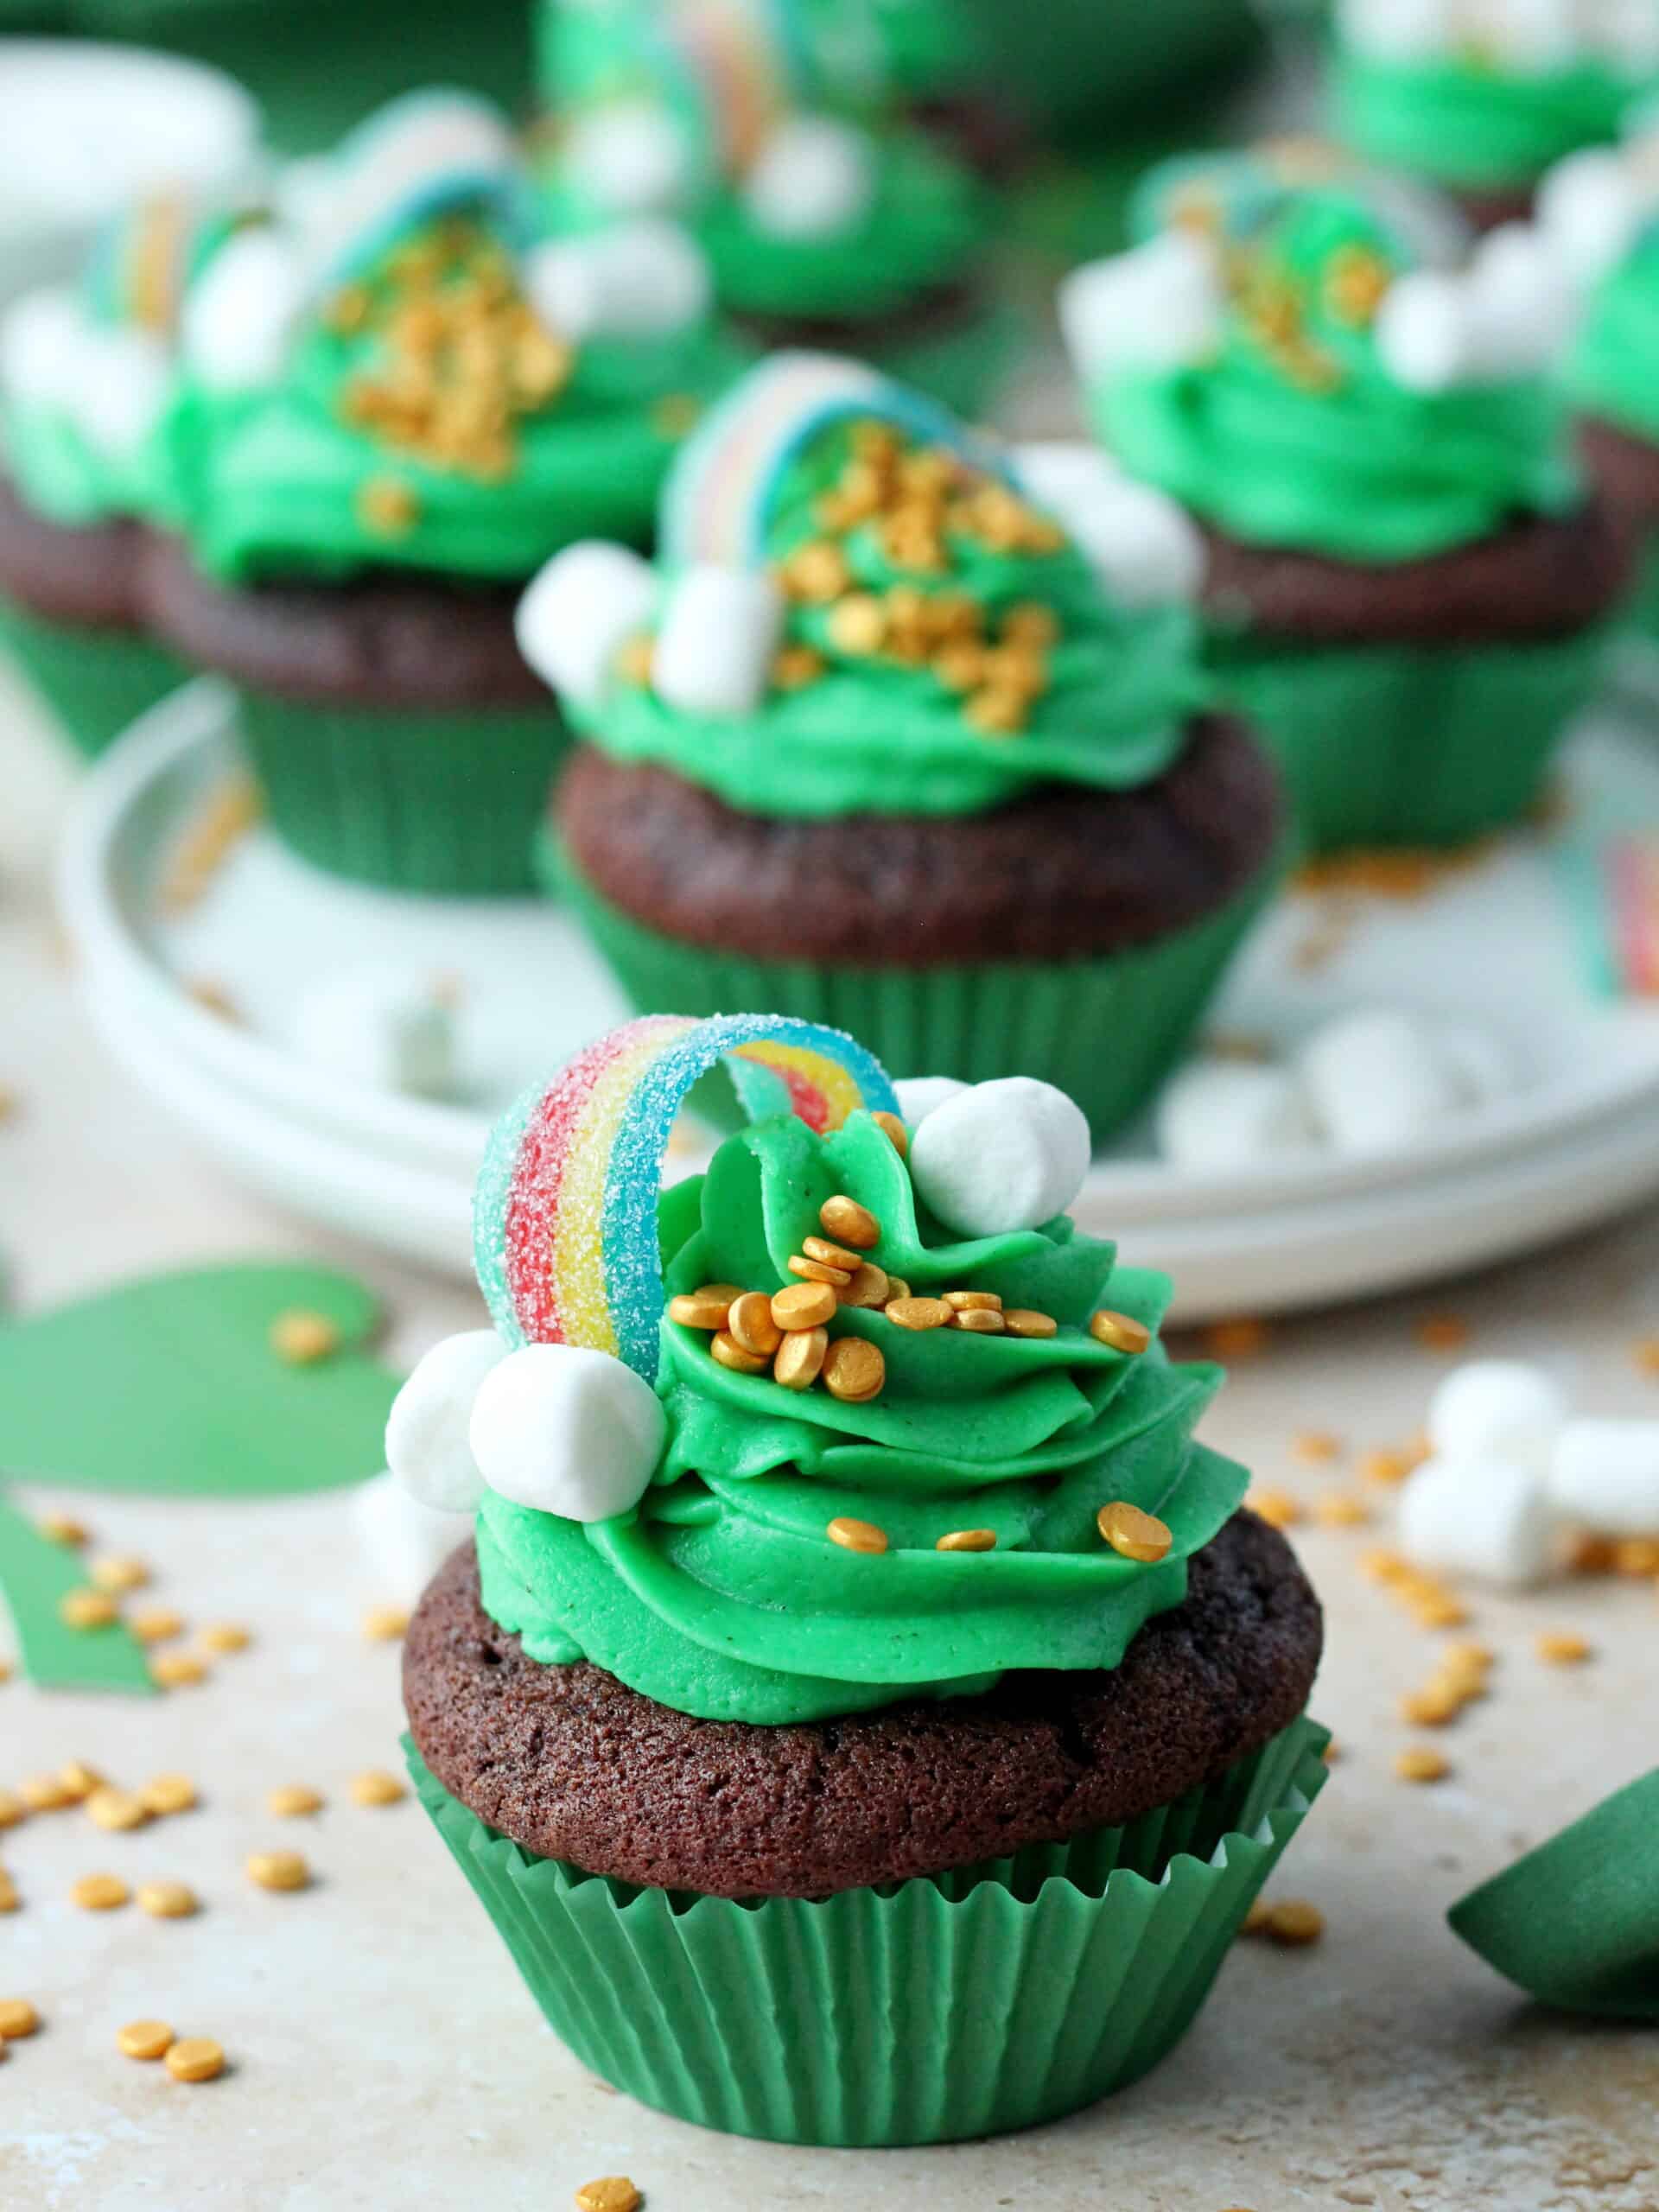
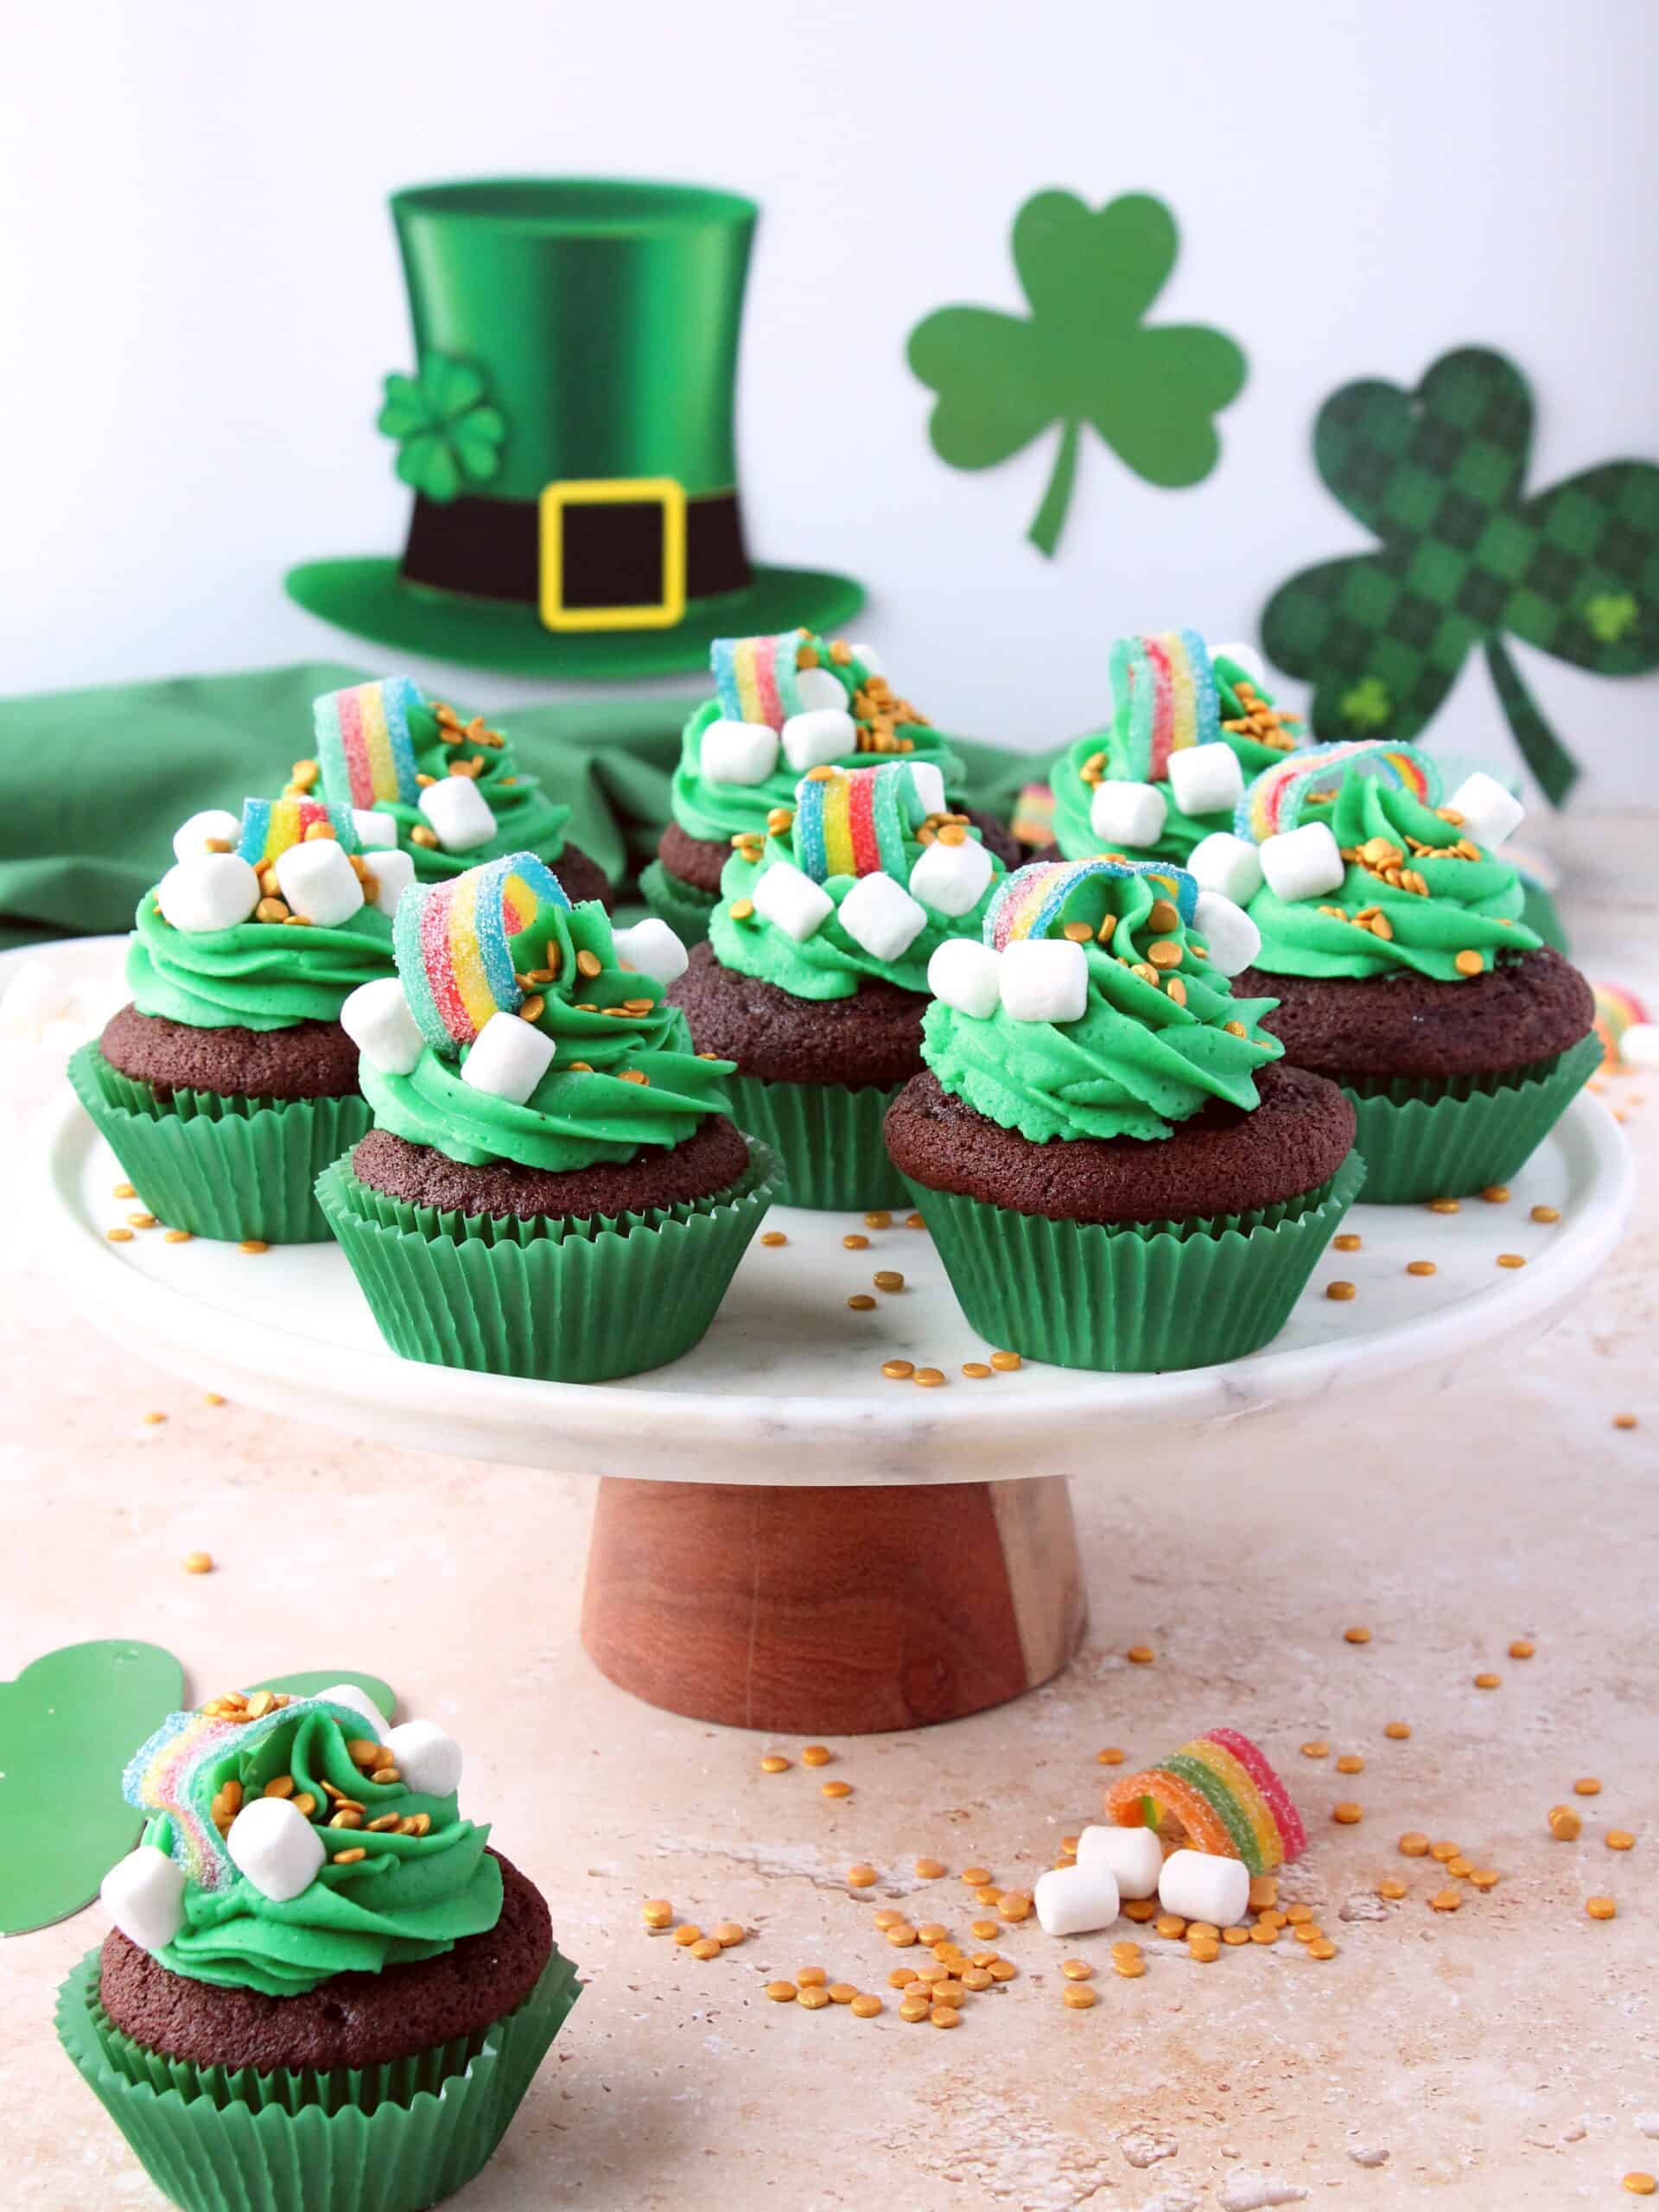
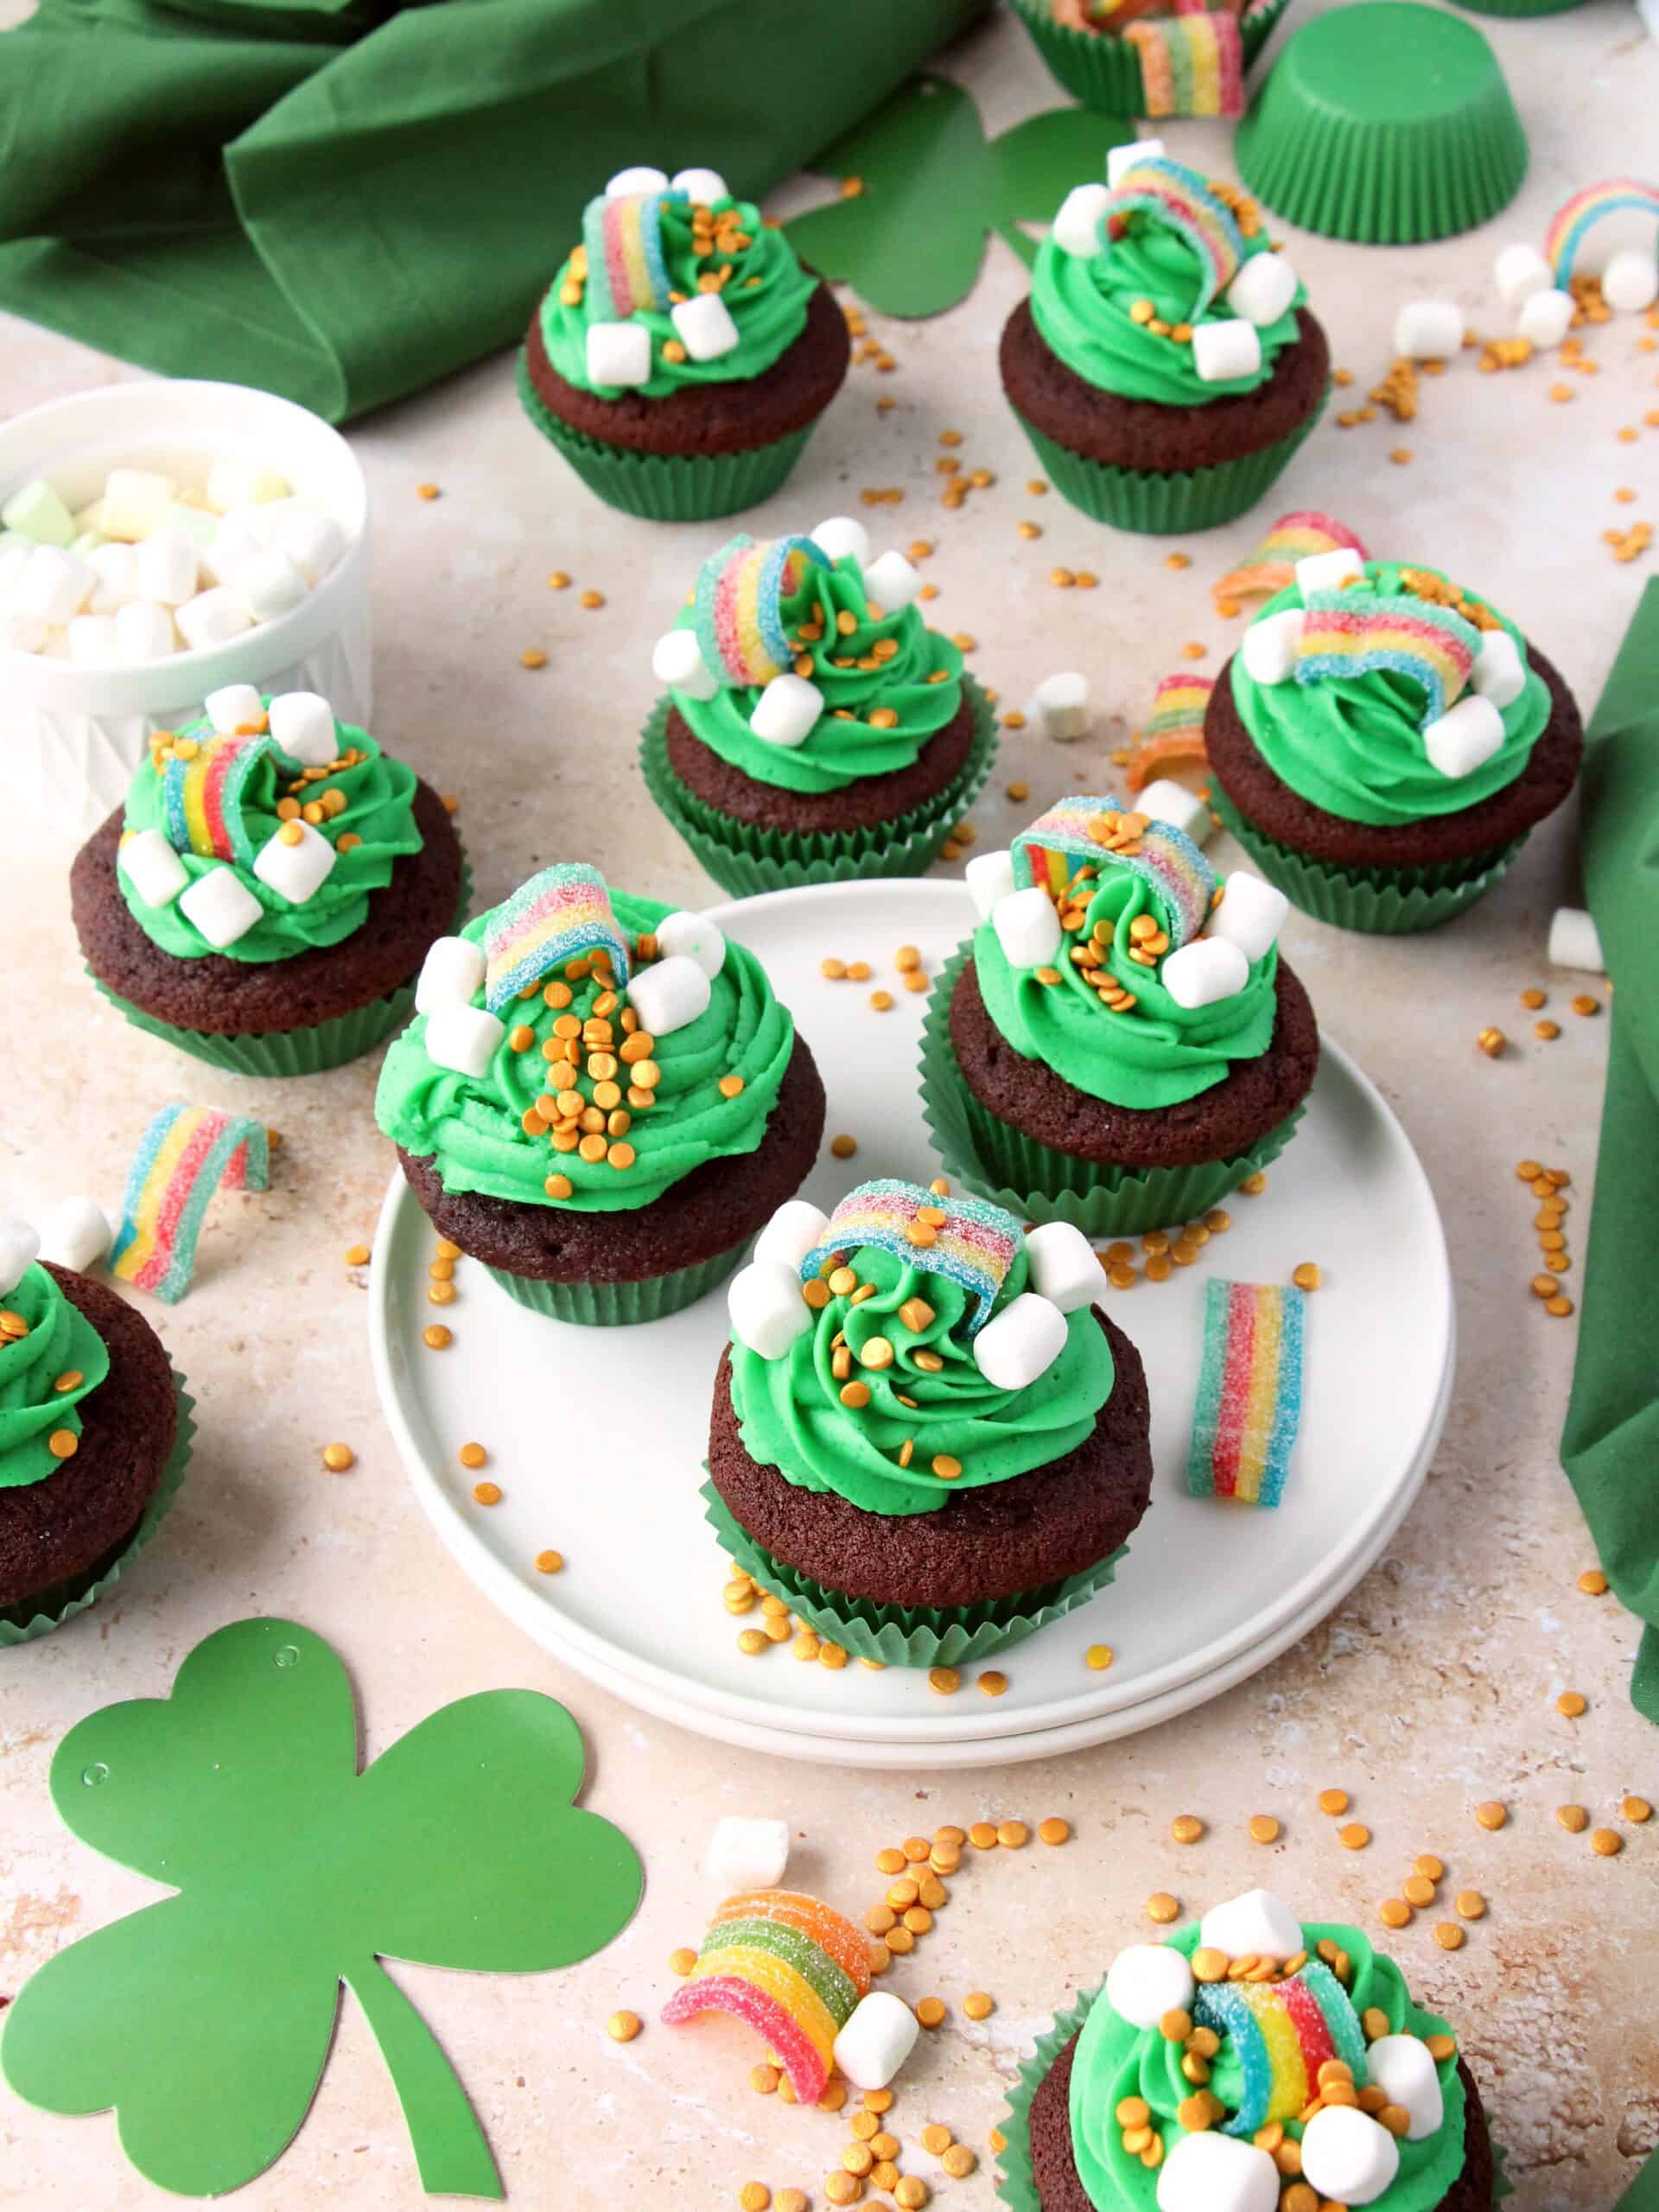
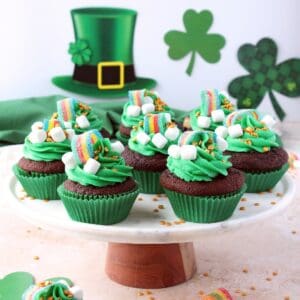
These St. Patrick’s Day cupcakes are full of chocolate flavour, topped with delicious buttercream in themed green colour and decorated with rainbow candy and golden coins surprise inside. These cupcakes are whipped up in no time to celebrate St. Patrick’s Day with your friends and family.
This post is part of the Home Hardware sponsored program. I received compensation as a thank you for my participation. All thoughts and opinions expressed in this post reflect my personal opinion about the products and information provided by the sponsor.
Why you’ll love making St. Patrick’s Day cupcakes
- Festive – These chocolate cupcakes make a perfect sweet treat to celebrate St. Patrick’s Day. The vibrant green buttercream, with the rainbow candy and marshmallow clouds, add a touch of magic to this holiday festivity.
- Easy & simple – These cupcakes are wiped up in almost no time. Beyond the festive decorations, the chocolate cupcakes themselves are a rich and satisfying indulgence. Making these cupcakes is a breeze, offering a festive baking experience for all skill levels.
Why do I choose Mosaic baking products for this recipe
Mosaic’s baking products from Home Hardware; such as measuring cups, bamboo mixing bowls, and non-stick muffin pan, are an excellent choice for this chocolate cupcake recipe. These quality products ensure a seamless and enjoyable baking experience, thus you want to bake more.
The ease and versatility of Mosaic’s lightweight bamboo bowls has made my baking more joyful and efficient. These bamboo bowls are available in three different sizes and make the mixing of batter and preparation of buttercream effortless.
With Mosaic’s baking products, you can bake with confidence, knowing that your St. Patrick’s Day creations will turn out beautifully every time!
Ingredients
- Unsalted butter: Serves as the primary fat in the recipe, providing moisture and richness to the cupcakes. Using unsalted butter allows better control over the overall salt content in the recipe.
- Dark chocolate chips: Contribute a deep, intense chocolate flavour to the cupcakes. Use dark chocolate chips with a minimum of 55% cocoa, that will ensure a rich and robust chocolate taste.
- Cocoa Powder: Intensifies the chocolate flavour and adds a deep colour to the cupcakes. Use Dutch processed cocoa for the best results.
- All-Purpose Flour: Forms the base of the cupcake batter, providing structure and stability.
- Baking Soda: Helps the cupcakes rise by reacting with acidic ingredients like cocoa powder.
- Baking Powder: Further contributes to the leavening of the cupcakes, ensuring a light and fluffy texture.
- Salt: Enhances the overall flavour of the cupcakes, balancing the sweetness and intensifying the chocolate taste.
- Eggs: Act as a binding agent and provide structure to the cupcakes. Use room temperature eggs, to incorporate more easily into the batter.
- Granulated Sugar: Sweetens the cupcakes and contributes to their moisture and tenderness.
- Brown Sugar: Adds a subtle caramel flavour and moistness to the cupcakes. It also contributes to the soft texture of the final product.
- Milk: Adds liquid to the batter, ensuring a smooth and pourable consistency. Room temperature milk integrates better with the other room temperature ingredients.
- Decorating candies and sprinkles: Adds extra festive look for St-Patrick’s Day.
How to make St. Patrick’s Day cupcakes recipe
Step 1 – Prepare batter for chocolate cupcakes
Preheat the oven to 350°F (177°C) & line Mosaic non-stick muffin pan with green paper liners.
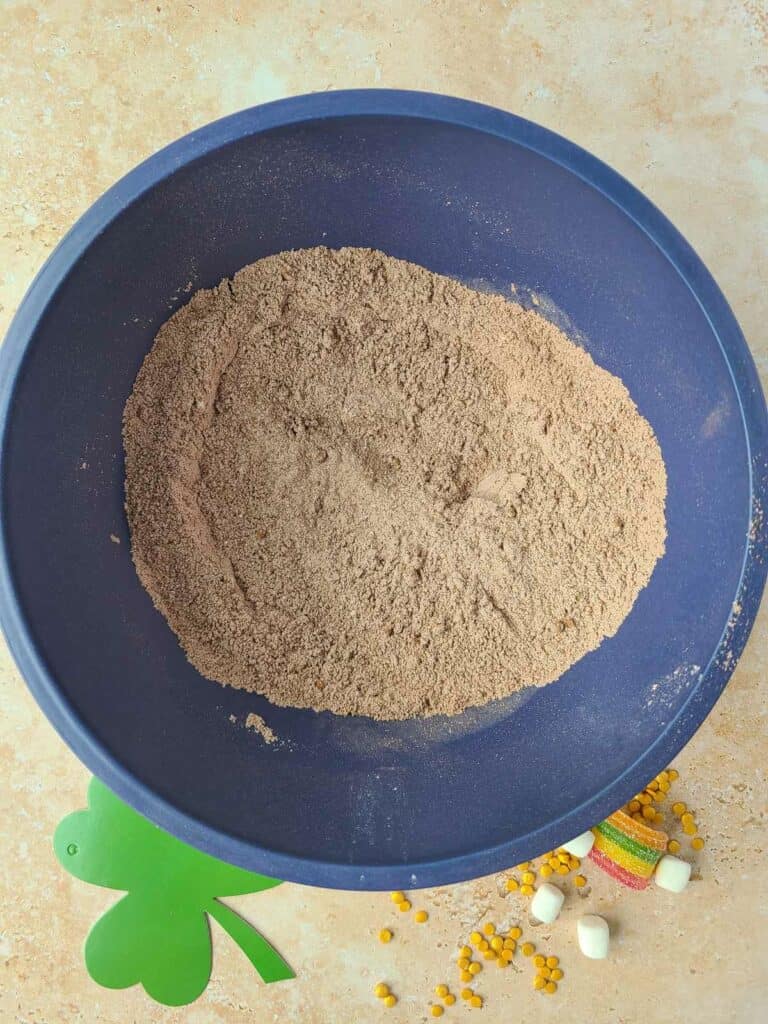
In a medium-sized bowl, sift together the flour, cocoa powder, baking powder, baking soda, and salt. Set aside.
Melt the chocolate chips in a microwave, by heating it on 70% power for 1 minute. Repeat if necessary for an additional 30 seconds, until the chocolate chips are melted. Set aside.
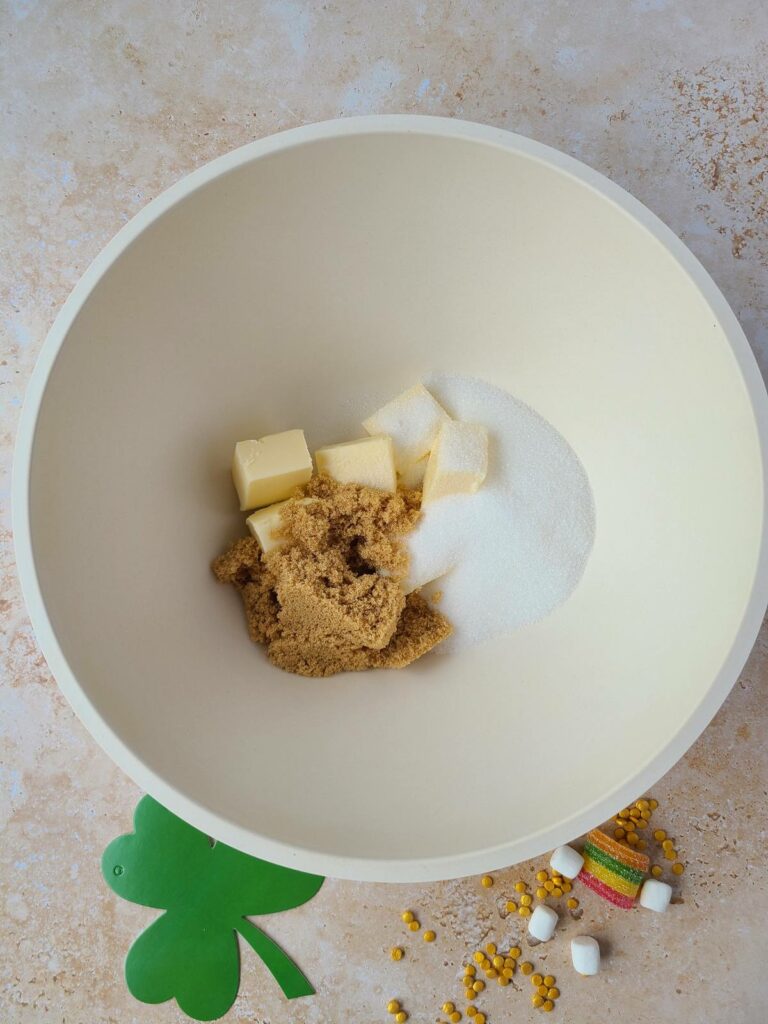
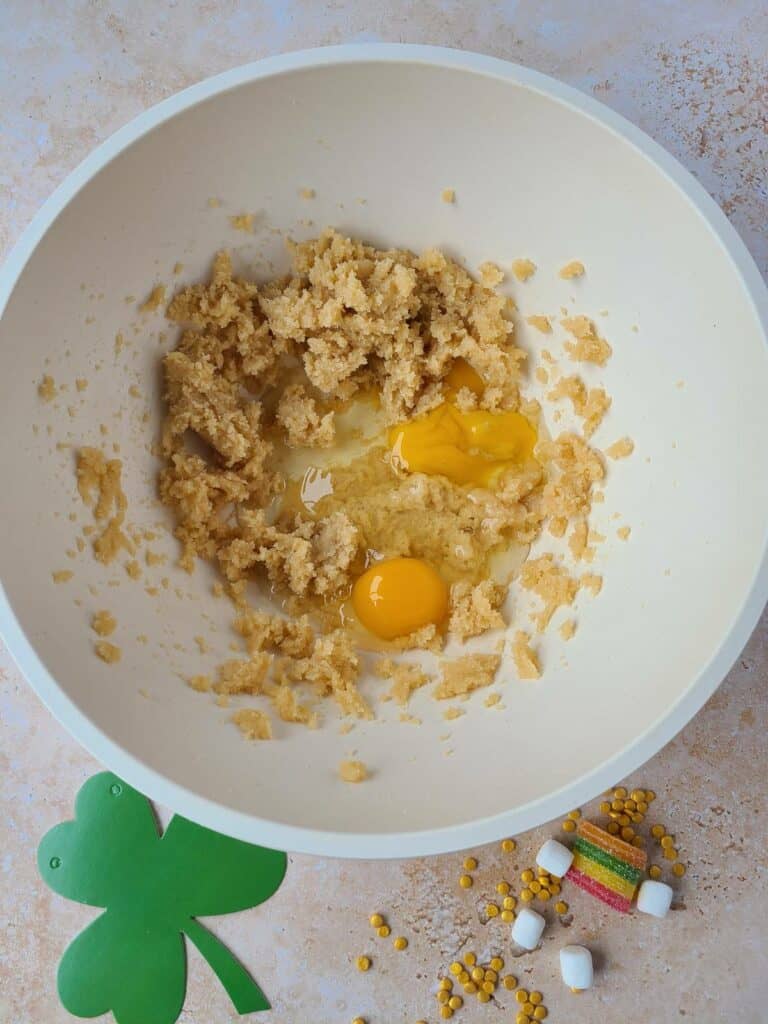
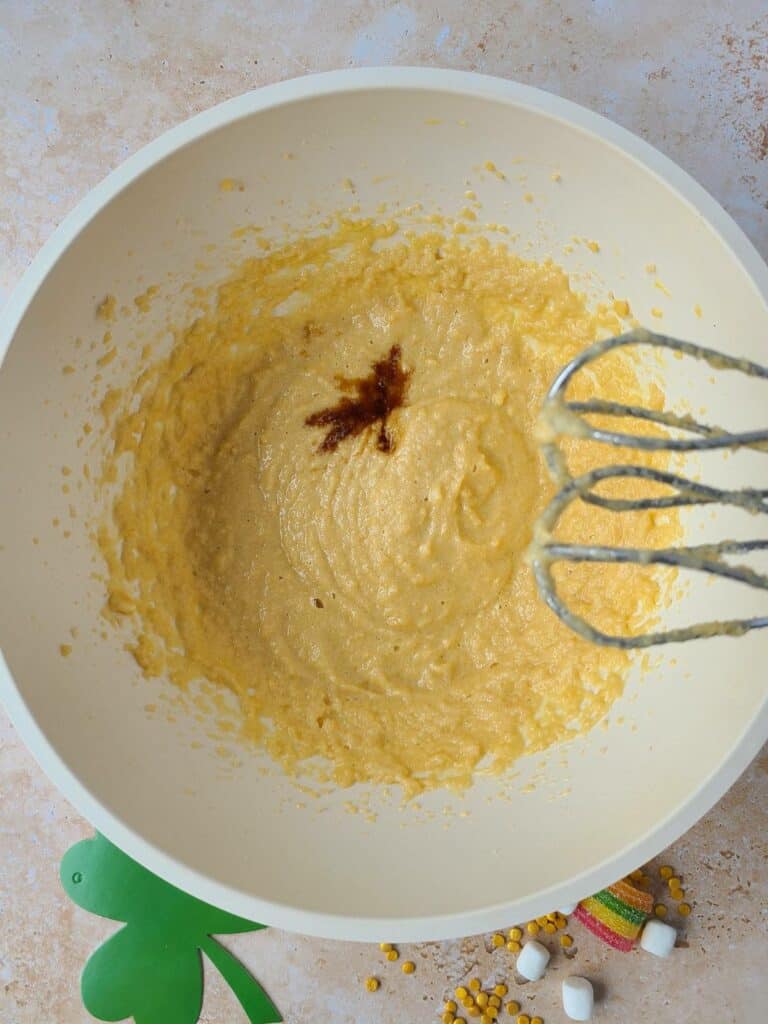
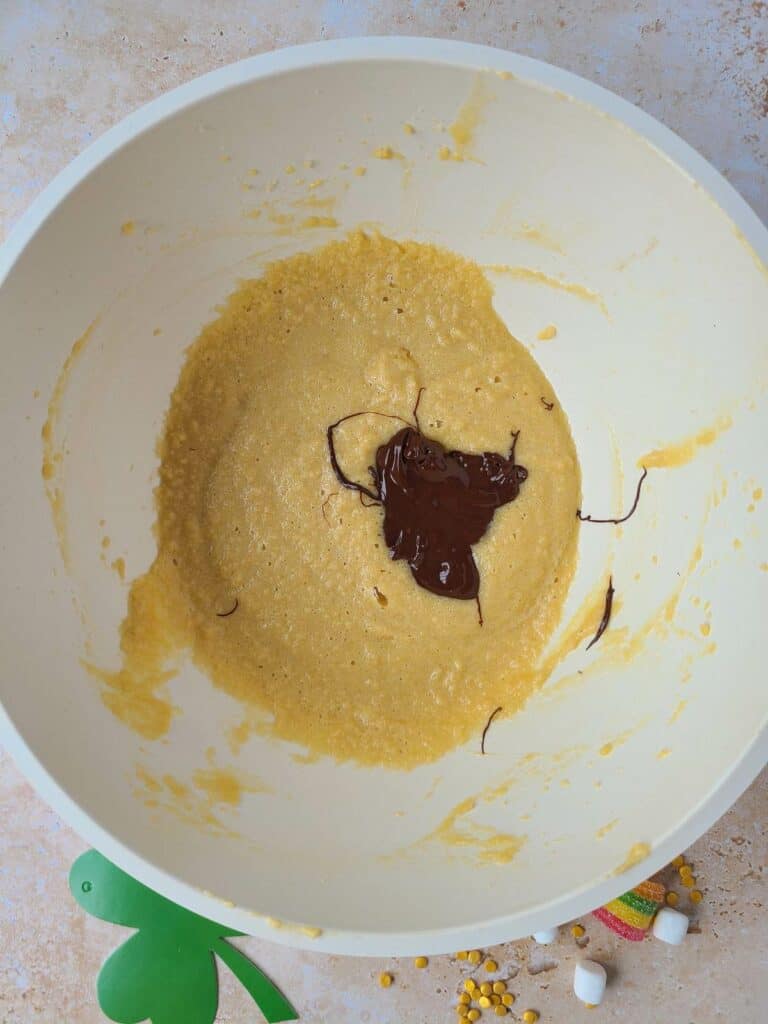
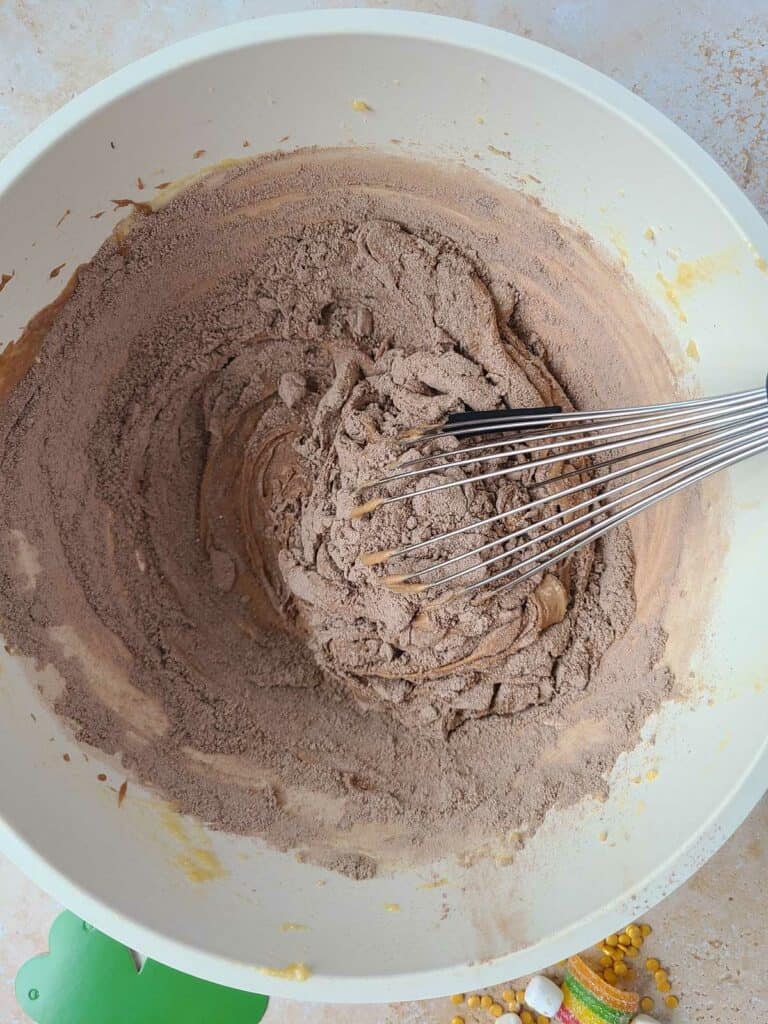
In a large bowl, cream softened butter with granulated and brown sugar together, until creamy and fluffy. Add eggs and mix until they are well incorporated. Stir in the vanilla extract and the melted chocolate. Mix until well combined.
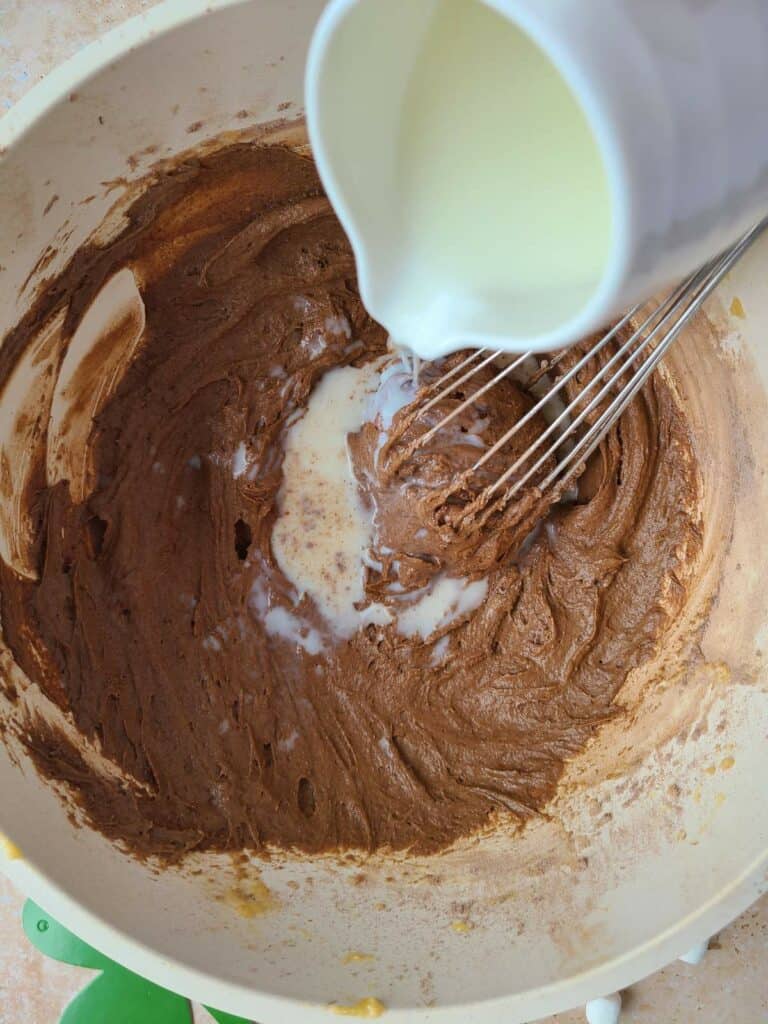
Gradually add the dry ingredients to the wet ingredients, alternating with the milk. Begin and end with the dry ingredients, mixing just until combined. Be careful not to overmix.
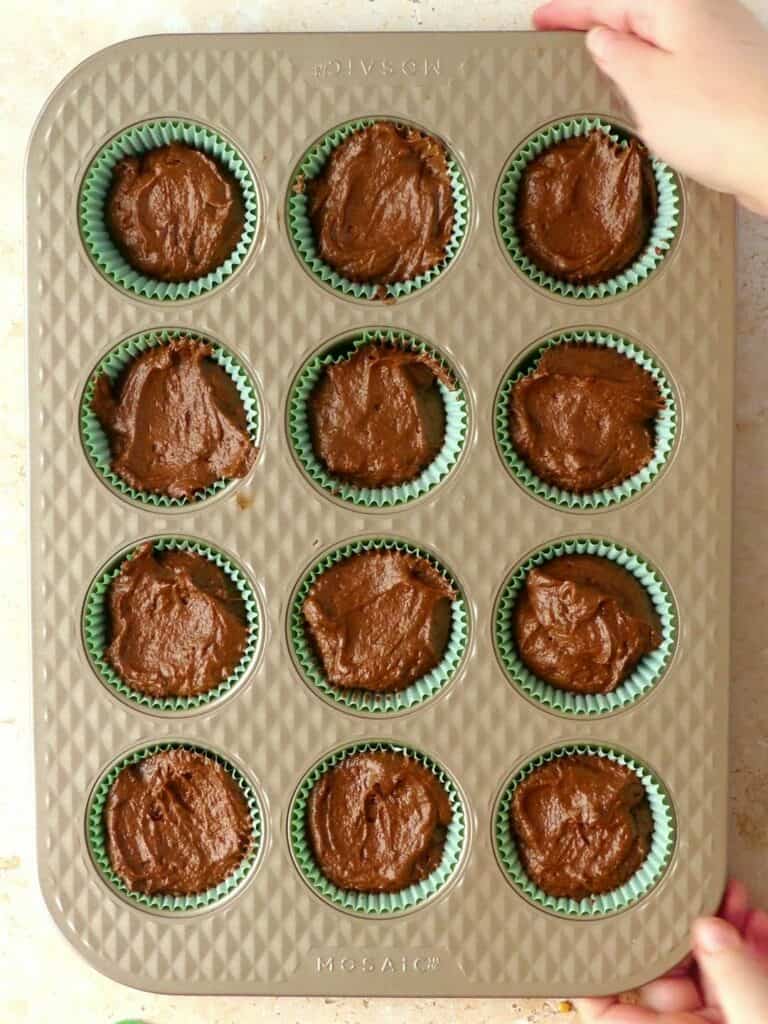
Spoon the batter into the cupcake liners, filling each about 2/3 full.
Step 2 – Bake & cool the chocolate cupcakes
Bake in the preheated oven for about 15–18 minutes, or until a toothpick inserted into the centre comes out clean. Allow the cupcakes to cool in the muffin pan for a few minutes before transferring them to a wire rack to cool completely.
Step 3 – Prepare green vanilla buttercream
In a large mixing bowl, beat the softened butter using an electric mixer or a stand mixer with paddle attachment, until it is creamy and pale.
Gradually add the powdered sugar to the creamed butter. Start with a slow speed to avoid a cloud of sugar, then increase the speed as the sugar is incorporated. Continue beating until the mixture is smooth and fluffy. Scraping down the sides of the bowl.

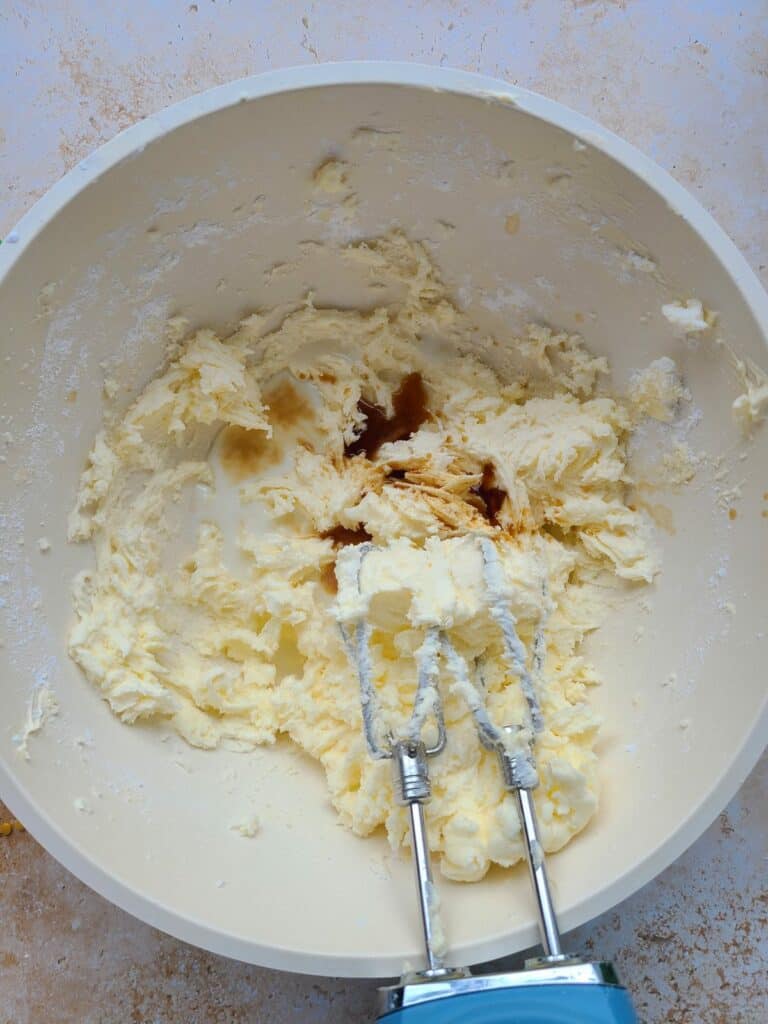
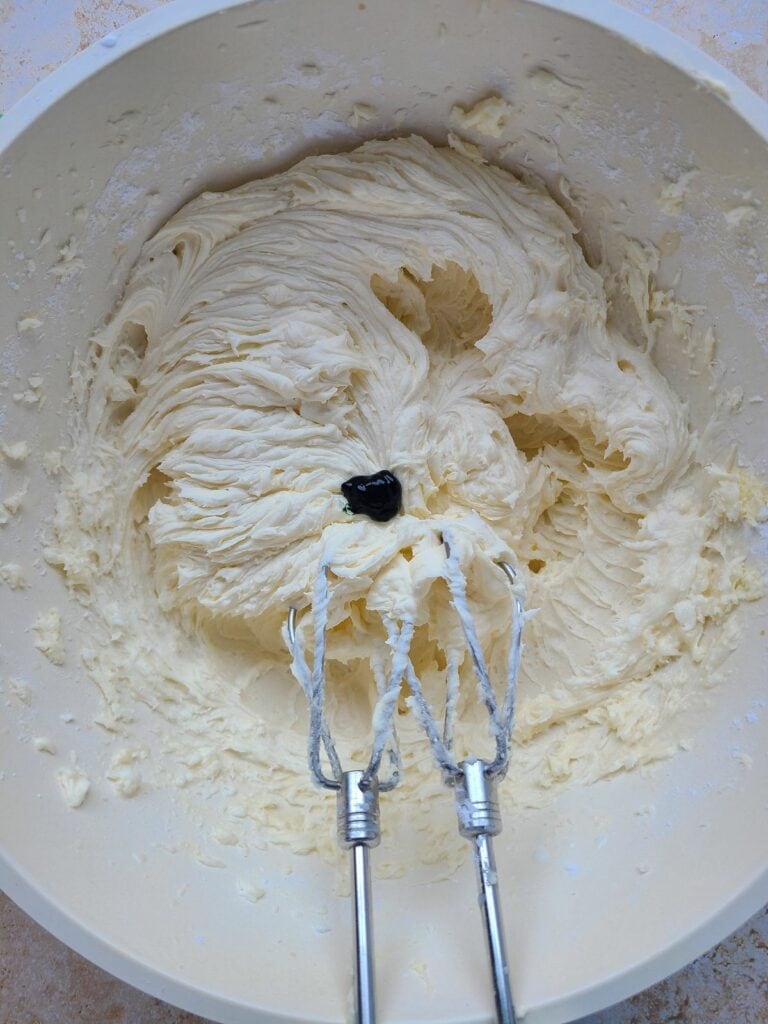
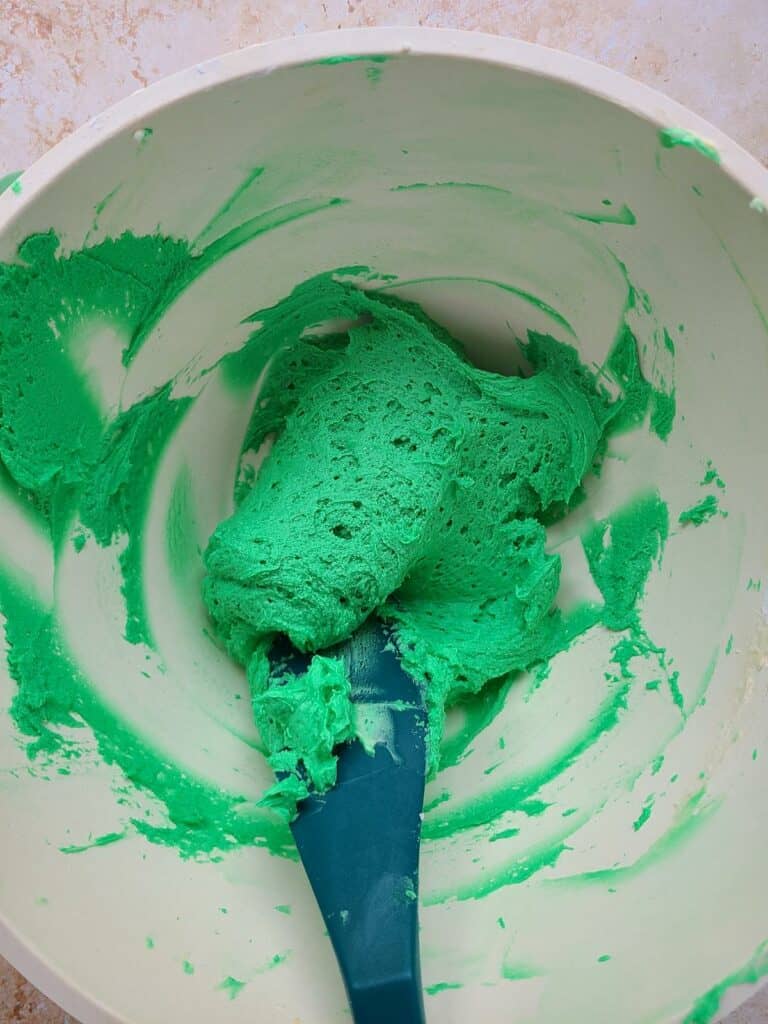
At the end, add the vanilla extract & green food colouring to the buttercream. Mix until the vanilla and green food colouring is evenly distributed throughout the buttercream.
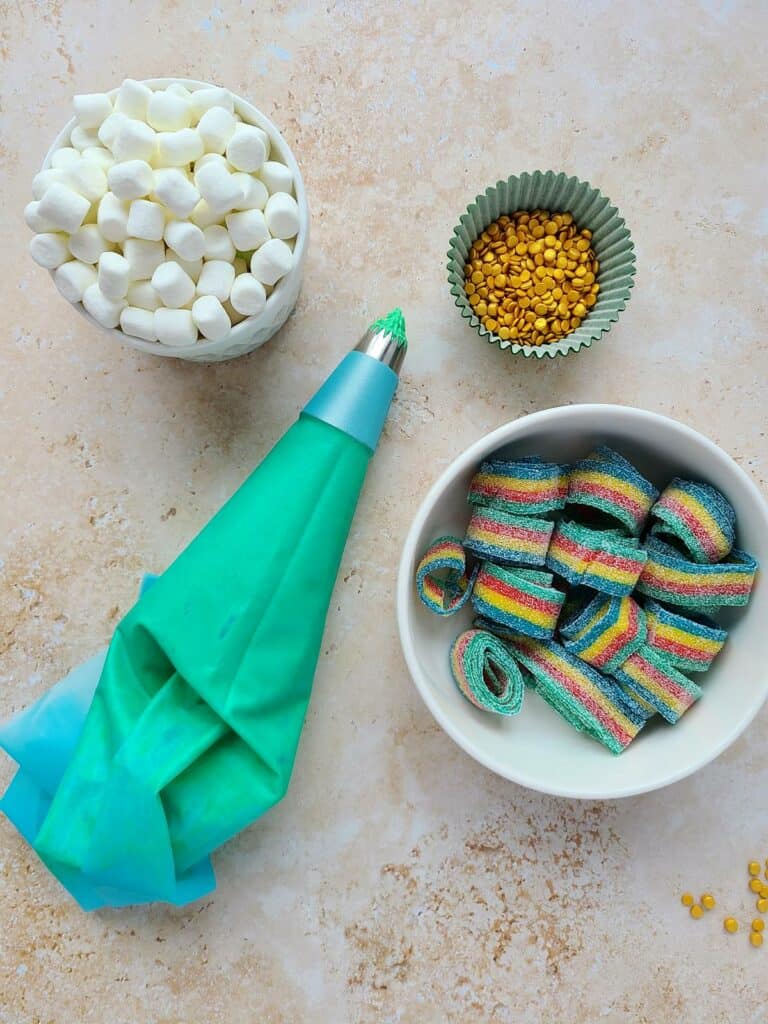
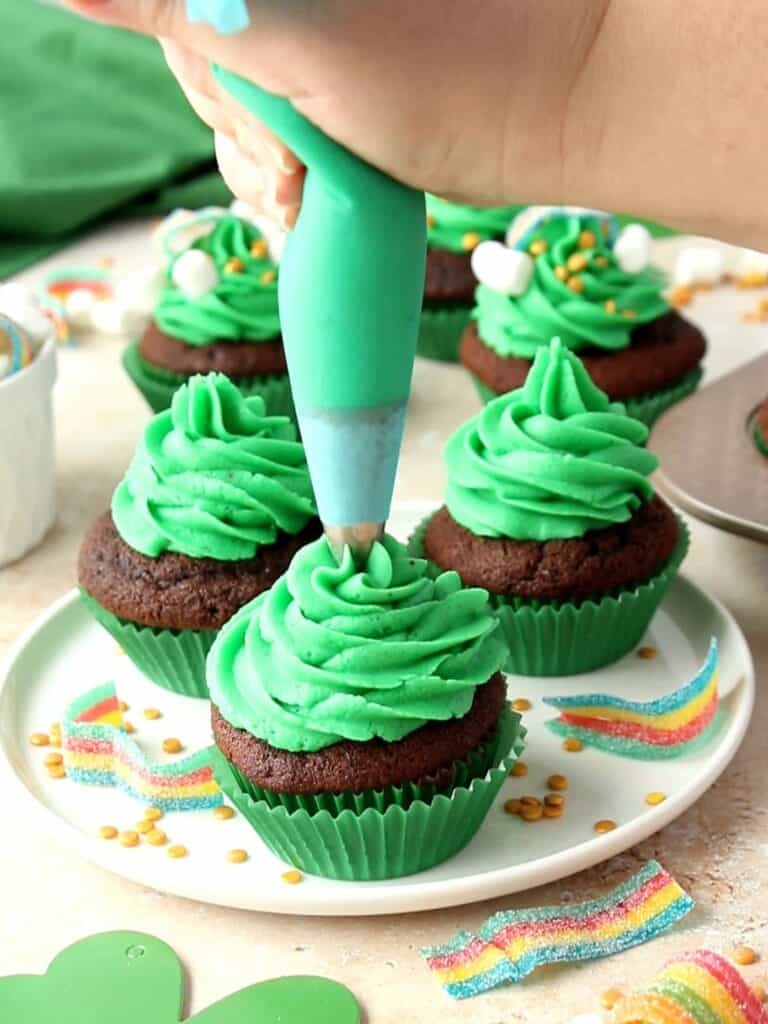
Pour the vanilla buttercream inside a piping bag with an 1M piping tip & keep it ready to pipe the swirls of buttercream.
Step 4 – Assemble the chocolate cupcakes
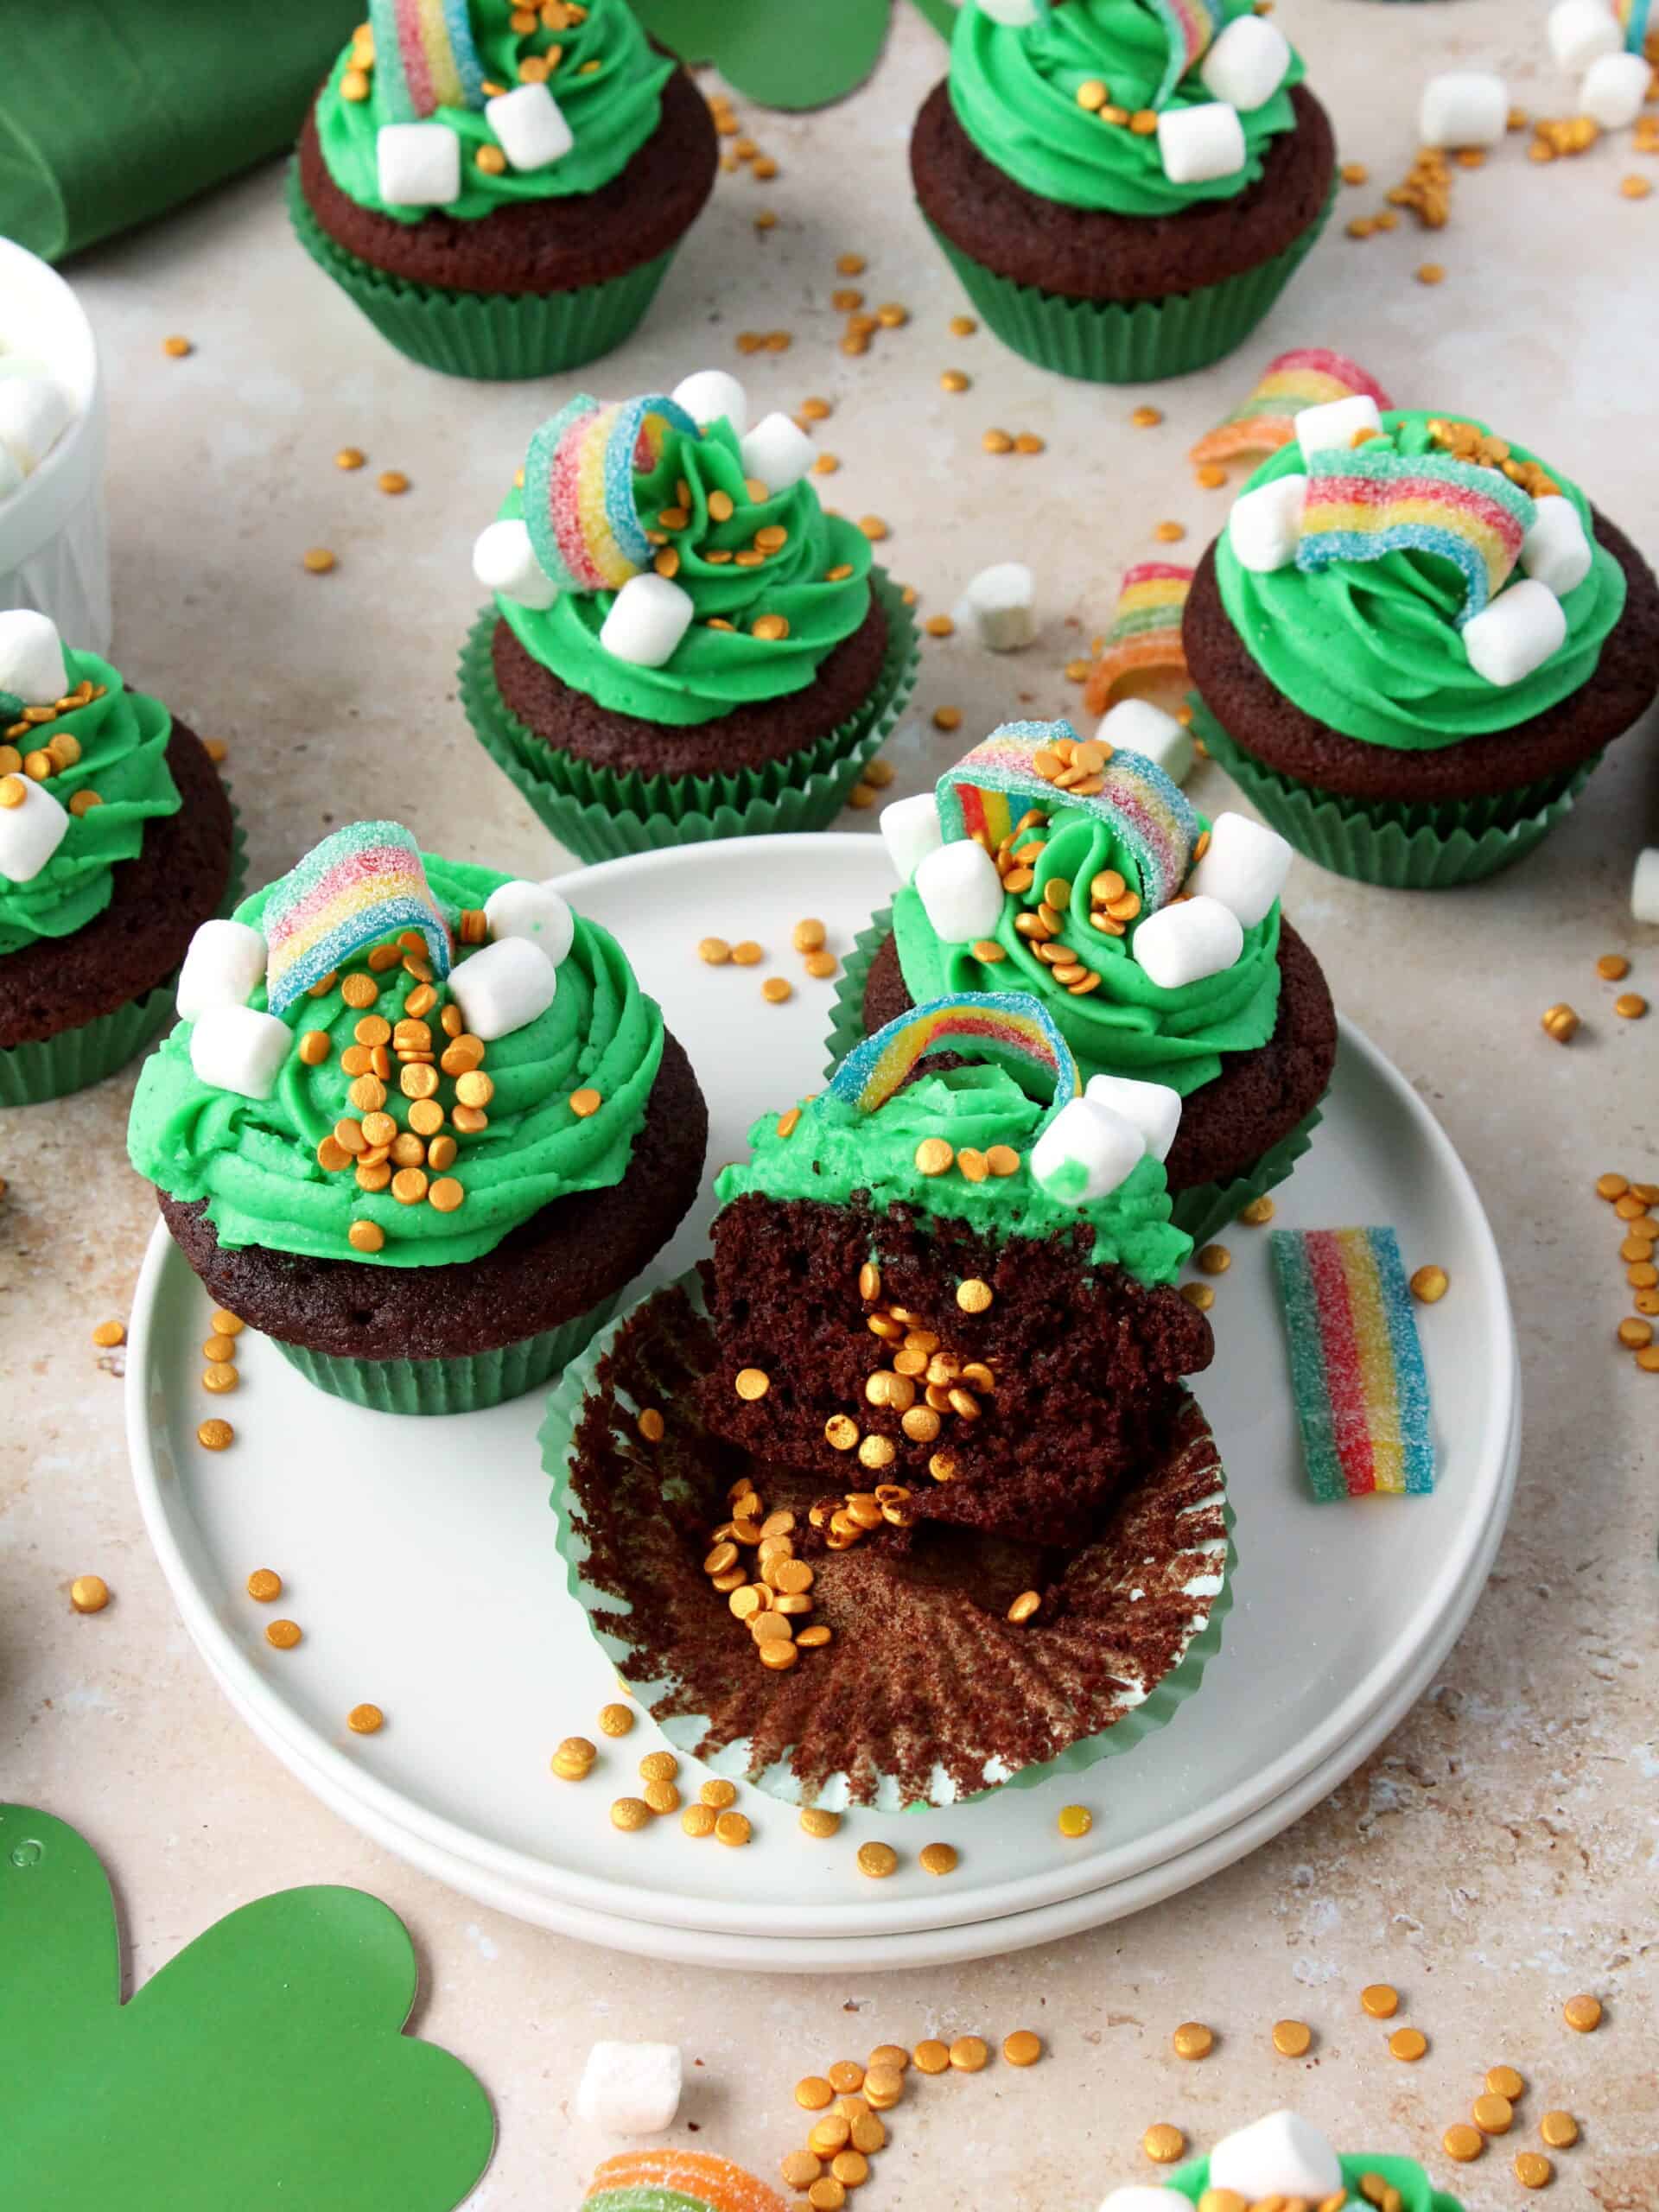
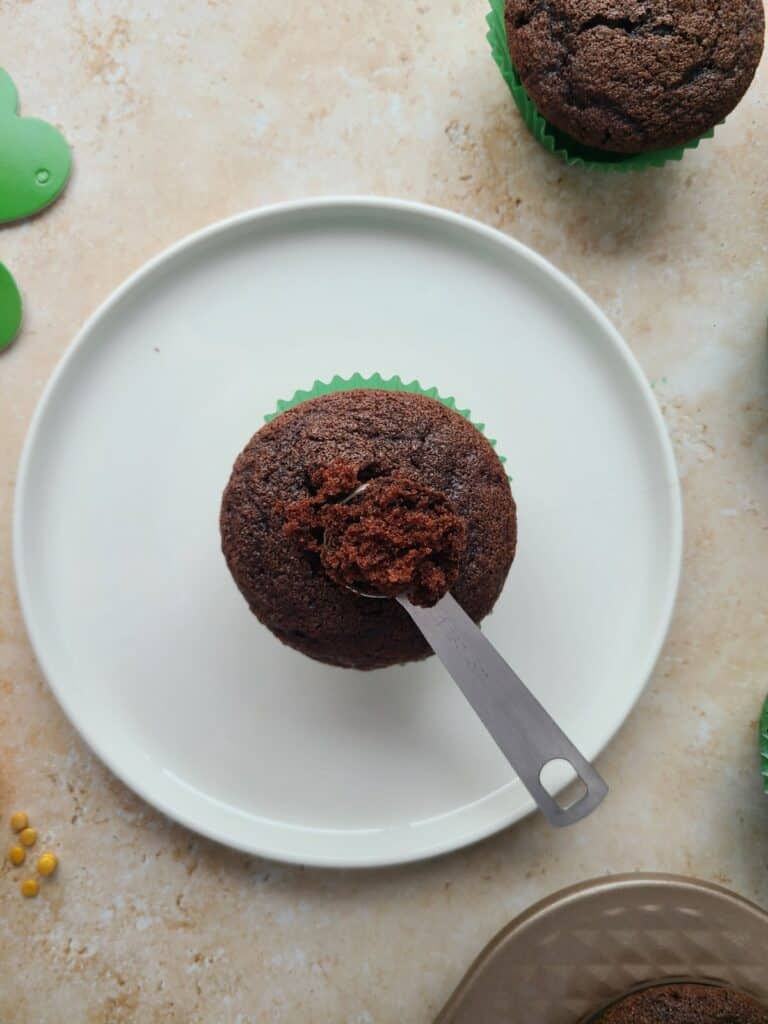
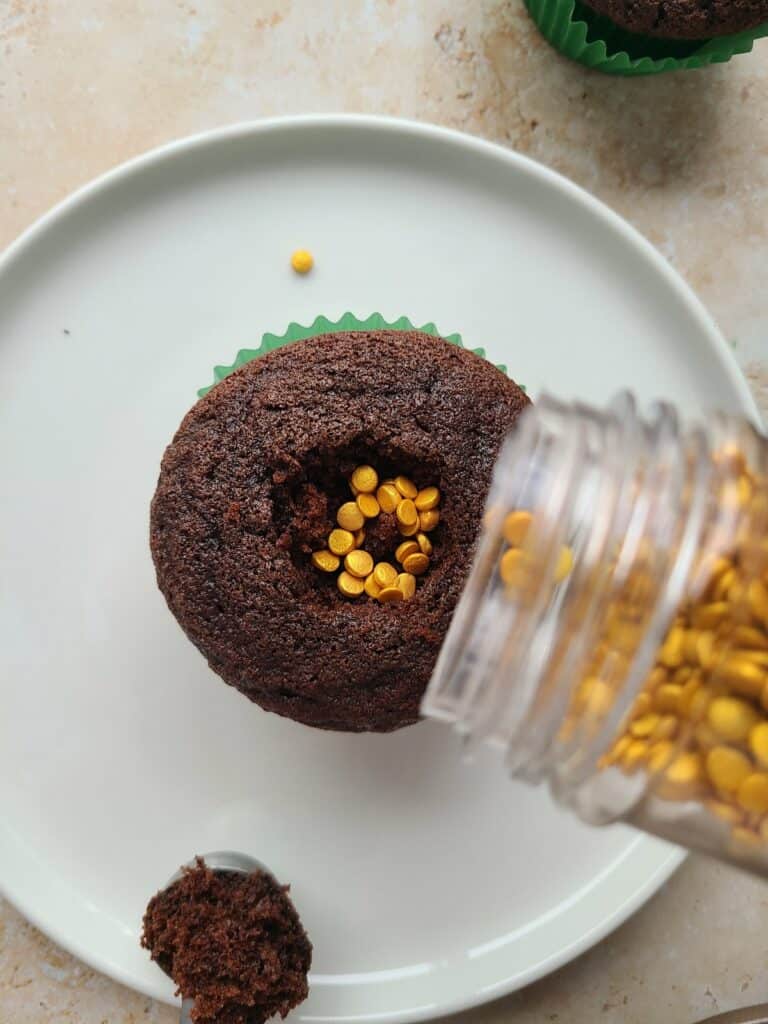
Once the cupcakes are cool, use a measuring 1 teaspoon to cut out the centre middle of your cupcakes. Fill the cupcakes with golden sprinkles and cover back with the cut-out piece of the cupcake.
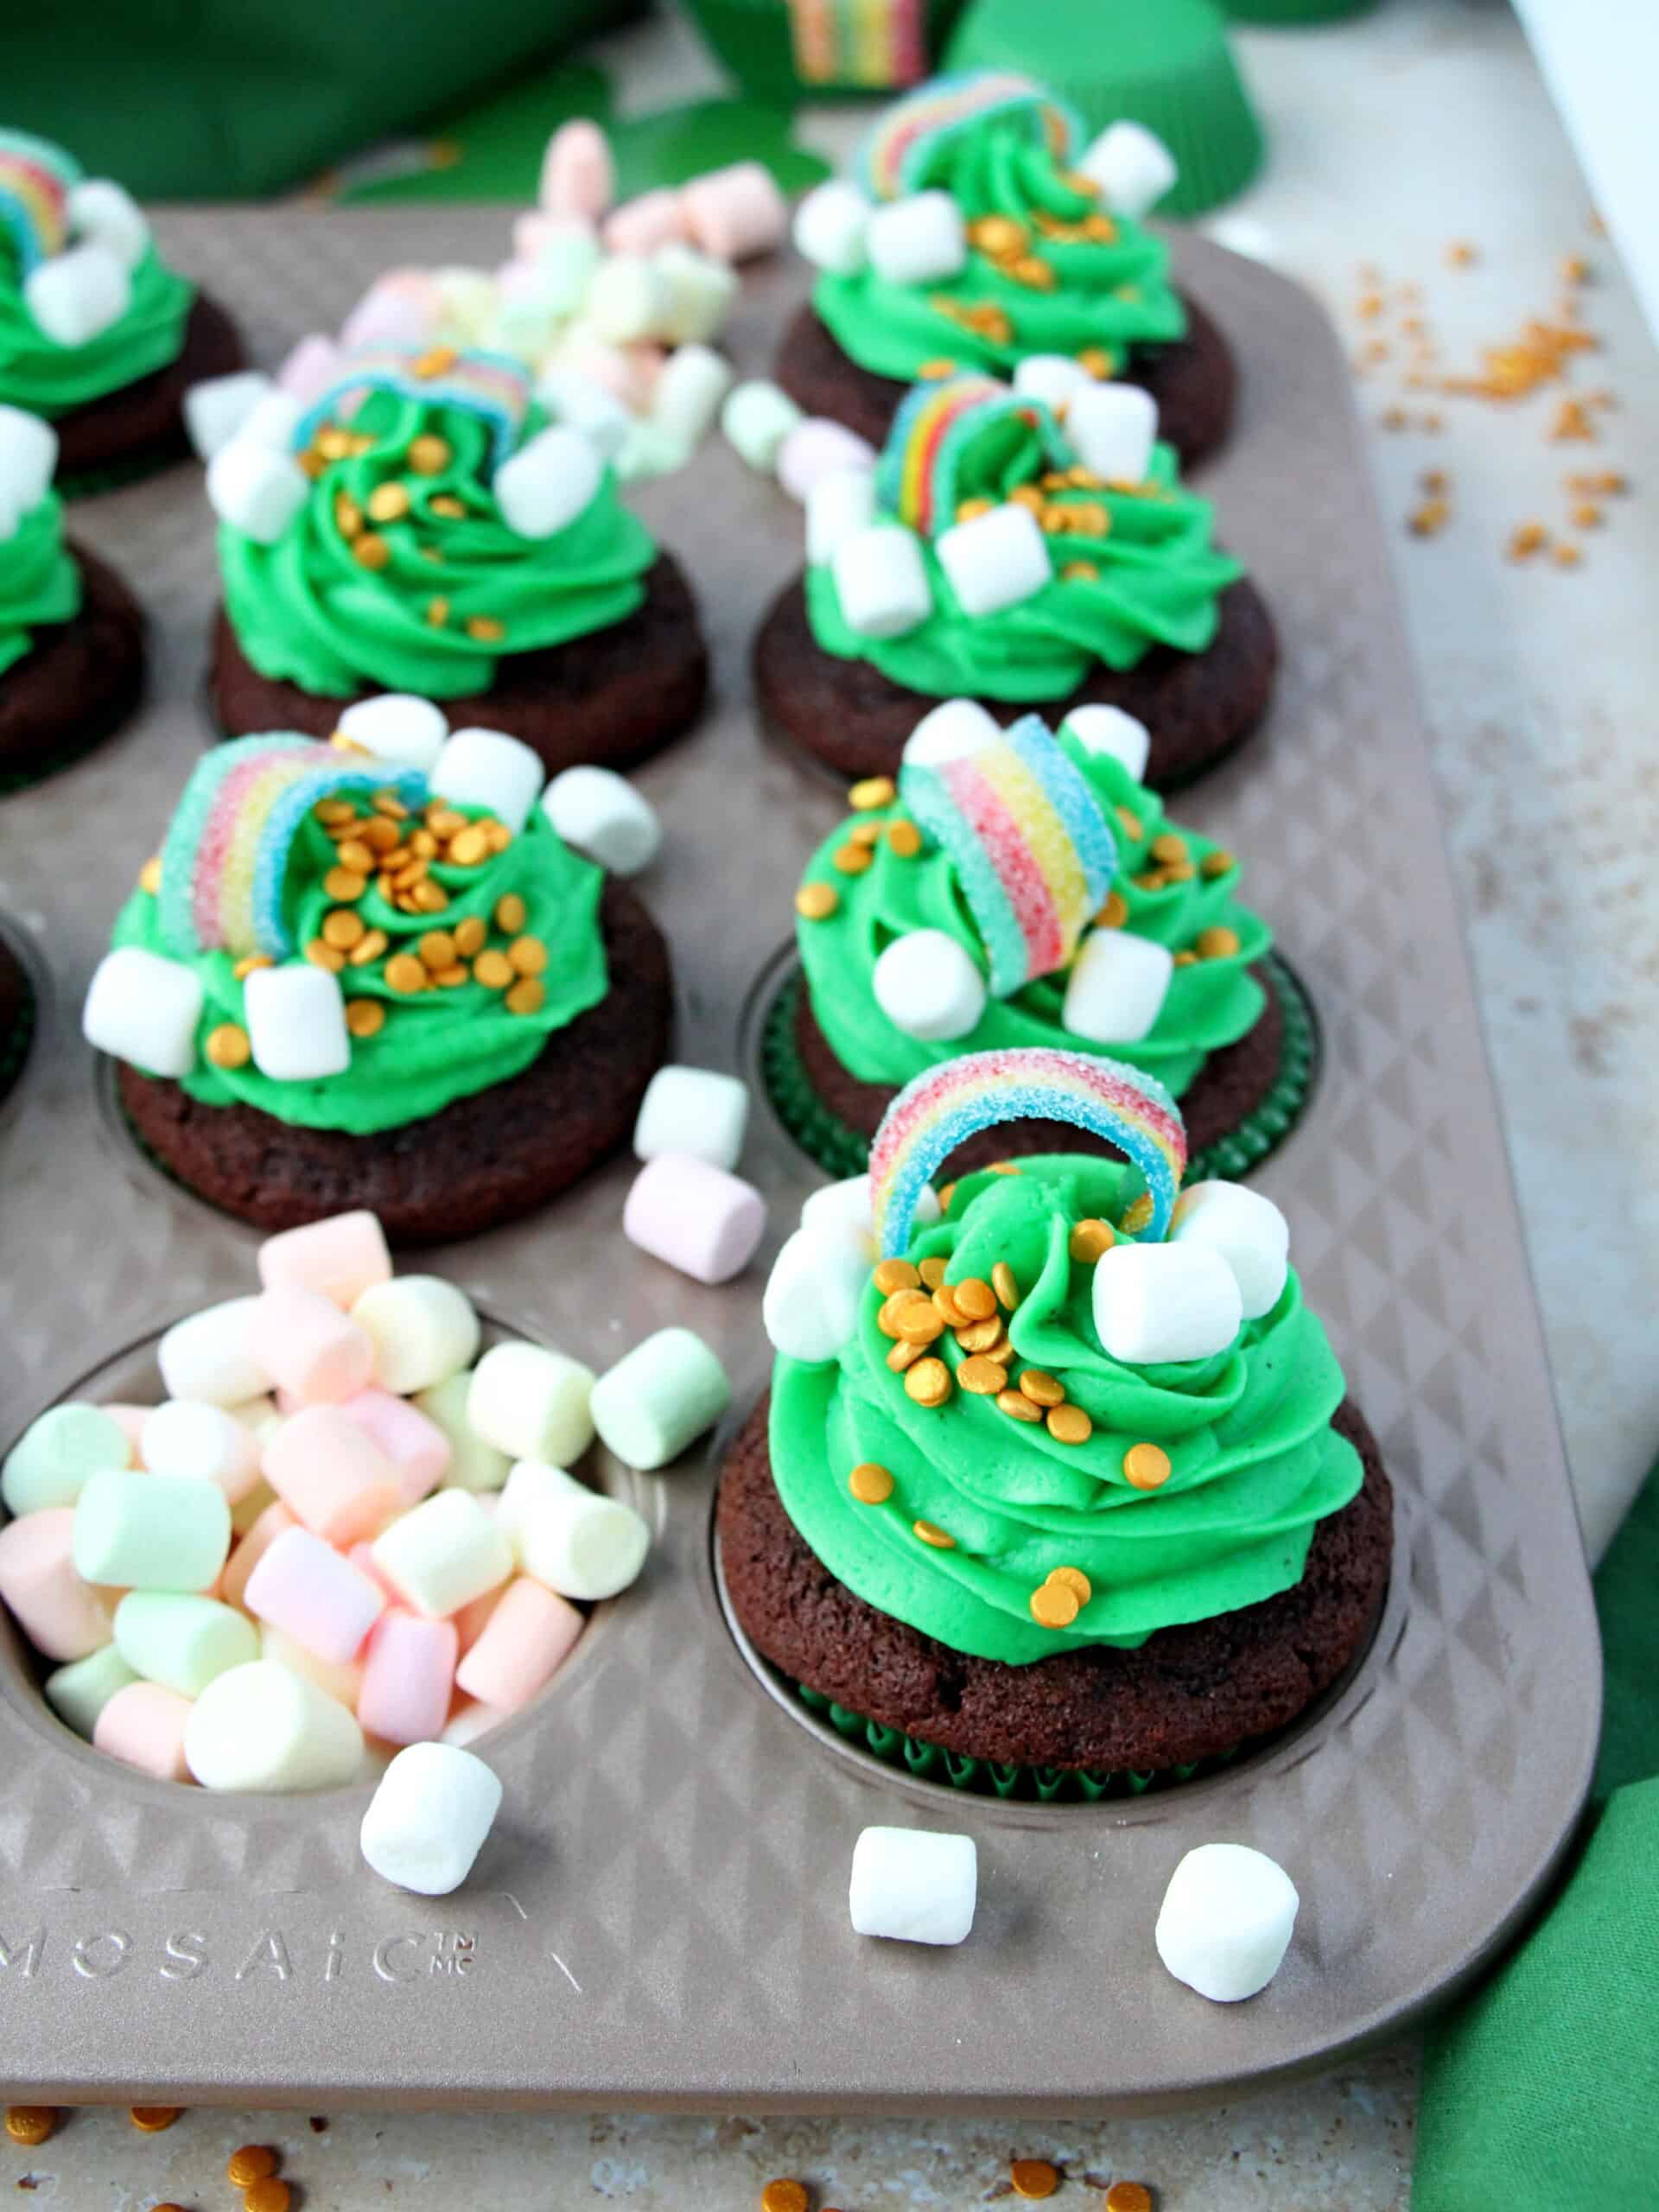
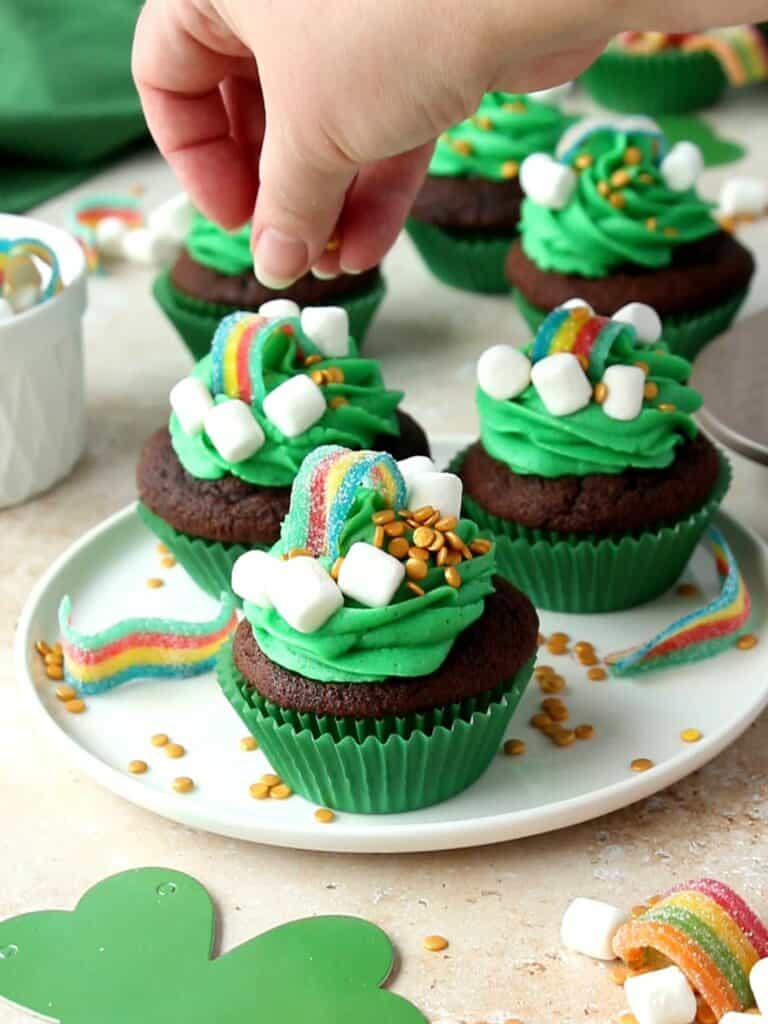
Pipe a green vanilla buttercream on top of each cupcake and decorate with strips of rainbow candy and marshmallows as clouds.
How to store chocolate cupcakes with buttercream frosting
- Storing instructions – To store leftovers, place them in an airtight container at room temperature for up to 2–3 days. If storing longer, refrigerate the cupcakes in the same container and bring them to room temperature before serving. Avoid stacking the cupcakes to prevent smudging the frosting, and enjoy them within a few days for the best taste and texture.
- Freezing instructions – You can freeze cupcakes with buttercream frosting for about 2 to 3 months when stored properly in the freezer. After frosting the cupcakes, place them on a baking sheet and flash freeze them for about 30 minutes. This helps the frosting set and prevents it from smudging when wrapped. Once the cupcakes are flash-frozen, wrap each cupcake individually in plastic wrap to protect them from freezer burn and odors. After wrapping, place the individually wrapped cupcakes in a freezer bag or airtight container.
- Thaw frozen cupcakes with frosting – When ready to enjoy, remove the desired number of cupcakes from the freezer and let them thaw in the refrigerator overnight. Bringing them to room temperature before serving ensures the best texture.
Variations
- Mint Chocolate Bliss Cupcake – Infuse the chocolate cupcake batter with a hint of mint extract and add a touch of mint extract to the green buttercream for a refreshing twist. On top place mini mint chocolates
- Irish Cream Dream Cupcakes – Add Baileys cream liqueur into the chocolate cupcake batter instead of milk for a rich flavour. Incorporate a splash of Irish cream also into the green buttercream. As a topping, sprinkle it with shaved chocolate.
- Triple Chocolate Indulgence Cupcakes – Fill the cupcake with chocolate ganache, instead of the gold sprinkles, for intense chocolate taste. For the buttercream, use only half the amount of the powdered sugar and add 1 cup of chocolate hazelnut spread for extra rich chocolate cupcakes. Top with chocolate sprinkles.
- Rainbow Delight Cupcakes – Add a rainbow-coloured sprinkles into the chocolate cupcake batter and fill each baked cupcake cavity with a rainbow surprise. Opt for a lightly mint-flavoured green buttercream for a subtle hint of freshness. Top with more rainbow-coloured sprinkles.
Expert Tips
- Quality Ingredients Matter – Use high-quality chocolate chips with a cocoa content of at least 60% for a rich and intense chocolate flavour.
- Room Temperature Ingredients – Bring eggs, butter and milk to room temperature before starting. Room temperature ingredients blend more smoothly, resulting in a better-textured batter.
- Weigh Your Ingredients – For precision, consider weighing your dry ingredients, especially the flour and cocoa powder, instead of relying solely on volume measurements.
- Avoid Overmixing the Batter – Gently fold the dry ingredients into the wet mixture until just combined. Overmixing can lead to denser cupcakes.
- Proper Cupcake Filling – Fill the cupcake liners about 2/3 full to allow room for the cupcakes to rise. Use a cookie scoop or spoon for even distribution.
- Mindful Baking Time – Keep a close eye on the cupcakes during baking, as oven temperatures can vary. Use a toothpick to check for doneness; it should come out clean or with a few moist crumbs.
- Cool Completely Before Frosting – Allow the cupcakes to cool completely on a wire rack before applying the green buttercream. This prevents the frosting from melting and maintains the cupcakes’ structure.
- Stiffen the Buttercream for Piping – If using a piping bag for frosting, ensure the buttercream is stiff enough to hold its shape. Adjust the consistency by adding more powdered sugar if needed. Or place the buttercream in the refrigerator for 20 minutes, before piping it onto cupcakes. Mix the buttercream for a short 30 seconds to restore the fluffiness.
- Rainbow Candy Placement – Prepare the rainbow candy in advance by placing the strip over a round object, for example a bottle of vanilla extract, to keep the rainbow round shape.
FAQ’s
Yes, you can bake the cupcakes a day in advance. Allow them to cool completely before storing in an airtight container. Add the frosting and toppings just before serving for a fresh appearance.
Absolutely! While dark chocolate chips are recommended in this recipe, you can use semi sweet or even milk chocolate based on your preference.
Ensure the cupcakes are completely cooled before frosting. If your kitchen is warm, you can briefly refrigerate the frosted cupcakes to set the buttercream before adding rainbow candy and marshmallow clouds.
Yes, you can use egg substitutes such as applesauce, mashed banana, or yogurt. Instead of regular butter, use vegan butter and substitute milk for any other plant based milk, such as cashew milk. Keep in mind that the texture may vary slightly, and the cupcakes may be denser.
No worries! You can simply use a butter knife or an offset spatula to spread the green buttercream on top of the cupcakes. The presentation may differ, but the taste will be just as delicious.
Store leftover cupcakes in an airtight container at room temperature for up to 2–3 days. If storing longer, refrigerate and bring them to room temperature before serving.
More recipes
- OREO CHEESECAKE CUPCAKES
- HALLOWEEN SPIDER CUPCAKES
- CHOCOLATE CUPCAKES FOR VALENTINES DAY
- BLACK FOREST CUPCAKES
- MINI BROWNIE CUPCAKES
ST-PATRICKS DAY CUPCAKES
Equipment
- 1 Mosaic Non-stick muffin pan
Ingredients
Chocolate cupcakes
- 1 cup (126 g) all-purpose flour
- 6 tablespoons (40 g) cocoa powder
- 1/2 teaspoon baking soda
- 1 teaspoon baking powder
- ½ teaspoon salt
- ½ cup (100 g) unsalted butter
- 2 large eggs room temperature
- ½ cup (100 g) granulated sugar
- ¼ cup (55 g) brown sugar
- ½ teaspoon vanilla extract
- ¼ cup (50 g) dark chocolate chips (min. 60%) melted
- ½ cup (120 ml) milk, room temperature
Green vanilla buttercream
- 1 cup (225 g) unsalted butter softened
- 4 cups (560 g) powdered sugar
- 4 tablespoons whole milk room temperature
- 1 teaspoon vanilla extract
- ½ teaspoon green gel-food colouring
Instructions
Chocolate cupcakes
- Preheat your oven to 350°F (175°C). Line Mosaic non-stick muffin pan with green paper liners.
- In a medium-sized bowl, sift together the flour, cocoa powder, baking powder, baking soda, and salt. Set aside.
- Melt the chocolate chips in a microwave, by heating it on 70% power for 1 minute. Repeat if necessary for an additional 30 second, until the chocolate chips are melted. Set aside.
- In a large bowl, cream softened butter with granulated and brown sugar together, until creamy and fluffy. Add eggs and mix until they are well incorporated. Stir in the vanilla extract and the melted chocolate. Mix until well combined.
- Gradually add the dry ingredients to the wet ingredients, alternating with the milk. Begin and end with the dry ingredients, mixing just until combined. Be careful not to overmix.
- Spoon the batter into the cupcake liners, filling each about 2/3 full.
- Bake in the preheated oven for about 15–18 minutes, or until a toothpick inserted into the centre comes out clean.
- Allow the cupcakes to cool in the muffin pan for a few minutes before transferring them to a wire rack to cool completely.
Green vanilla buttercream
- In a large mixing bowl, beat the softened butter using an electric mixer or a stand mixer with paddle attachment, until it is creamy and pale.
- Gradually add the powdered sugar to the creamed butter. Start with a slow speed to avoid a cloud of sugar, then increase the speed as the sugar is incorporated. Continue beating until the mixture is smooth and fluffy. Scraping down the sides of the bowl.
- At the end, add the vanilla extract & green food colouring to the buttercream. Mix until the vanilla and green food colouring is evenly distributed throughout the buttercream.
- Pour the vanilla buttercream inside a piping bag with an 1M piping tip & it's ready to pipe the buttercream with swirl motion onto the cupcakes.
Assembly of cupcakes
- Once the cupcakes are cool, use a measuring 1 teaspoon to cut out the centre middle of your cupcakes. Fill the cupcakes with golden sprinkles and cover back with the cut-out piece of the cupcake.
- Pipe a green vanilla buttercream on top of each cupcake and decorate with strips of rainbow candy and marshmallows as clouds.
Patrick
Looks very Yummy.
Julia
Thank you Patrick.